 Sag Rod (Legacy)
Tool summary :
- Can add the following sag rod types: straight, bent, straight+hook or bolt.
- The sag rod custom member can add holes to processable members:
- A sag rod can be added in space, without a connecting member.
- A Sag Rod icon can be added to your toolbar (classic) or ribbon (lightning). The icon, keyboard shortcut or context menu command can be found in the group named ' Model -- Member '. For lightning, Customize Interface is used to configure ribbons, keyboards, the context menu and modes.
- Another way to launch Sag Rod is to press F2 > check the box for "
 Miscellaneous steel " > double-click " Roof Frame ."
- This following example shows how to get a proper view for one situation. The same principles that are used in this example may apply to many different situations:
|
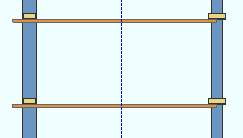
Suppose that you want to add a sag rod that puts holes in the center of the webs of these two toe-down channel girts, which are in perfect vertical alignment. |
|
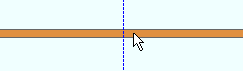
Snap to a vertical surface of one of the girts. In this example, the outside surface of the near side toe of the bottom girt is snapped to. |

|
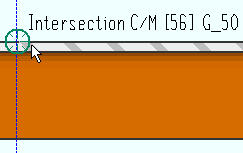
Use View > Relative Depth to move the work plane of your current view into the view depth by a value equal to half the depth of the girt. For this example, the Depth check " Out " distance was also adjusted. |
|
Now, when you add a sag rod and locate -- for example -- an INCM point, that point will be at half the depth of the girt. |
-
This help page also discusses locating work points and some options found on the Sag Rod window .
Also see :
|
page 1 | contents | model -- member | custom members | top
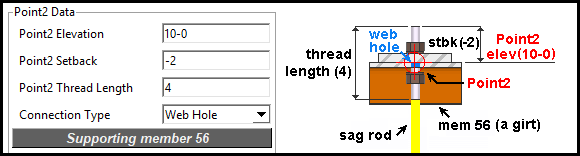
Locating work points and choosing a Rod Type :
Two work points are required to add a sag rod.
The two points can be in vertical, horizontal or diagonal alignment.
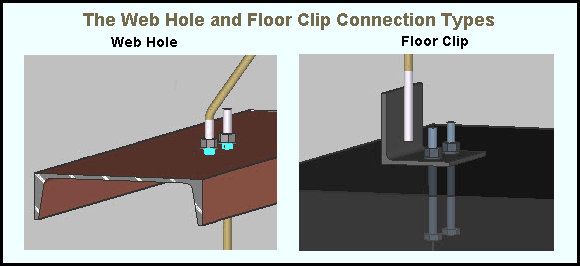
" Point1 " options for the 1st located work point are found on the left end of the Sag Rod window. " Point2 " options for the 2nd located work point are found on the right end of the Sag Rod window. Most options for " Point1 " and " Point2 " are the same. The " Connection Type " called ' Floor clip ' can only be applied on the " Point1 " half of the edit window.
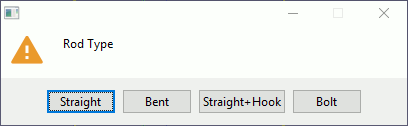
After locating the sag rod's two work points, a rod type selection window opens. You must press one of the buttons to continue. Pressing the " Straight " or " Straight-Hook " or " Bolt " button opens the Sag Rod window. Pressing " Bent " results in your having to locate two bend points, one for each end, after which the Sag Rod window opens.
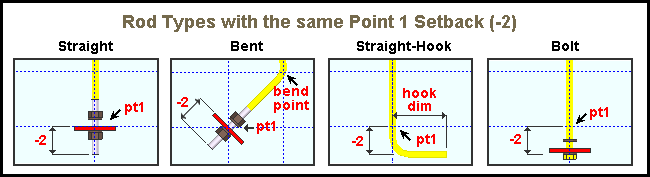
Note in the above examples that the point 1 end is the bottom end. Be aware that if point 1 was the top end, the hook for the ' Straight hook ' type would be on the top end, and the bolt head at the bottom end of the " Bolt " type would be at the top end, and so on ....
page 1 | contents | model -- member | custom members | top
Some options found on the Sag Rod window :
|
| Custom members such as the sag rods shown here look and behave much like regular members, but are actually generated using Python-based plugins. |
page 1 | contents | model -- member | custom members | top